Subscribe to Primary Goods
Get early access to exclusive deals, editors' picks and new launches.
Thank you! Your submission has been received!
Oops! Something went wrong while submitting the form.
NEED HELP?
CONTACT SUPPORT.webp)

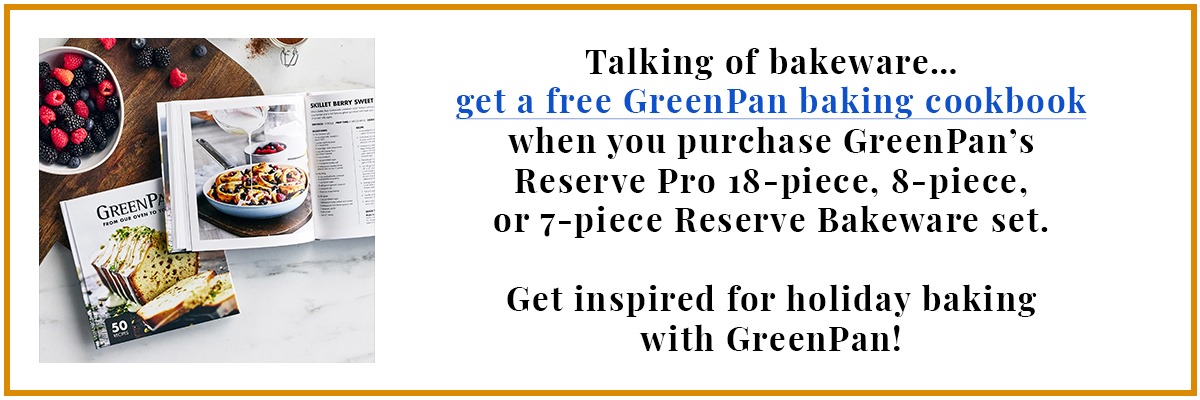
Editor's Note: GreenPan's Annual Factory Sale is live right now. Save up to 50% off sitewide and unlock exclusive gifts: a FREE Cook's Journal Cookbook 2.0 with orders of $275+ and a FREE Utensil Set with orders of $425+
Hands up if you’ve always wanted to learn to bake? Making birthday cakes for your friends, whipping up breakfast muffins on the weekends, and the unbeatable warmth of a freshly baked cookie should be something everyone should experience.
If you’ve never baked before, learning the ropes can feel as if you’re immersing yourself in a completely new language. You’ve got to start somewhere, but that doesn’t mean you need to do it alone. GreenPan’s healthy ceramic nonstick bakeware will help your cakes, biscuits, and loaves turn out perfect every time. They’ve been revolutionizing the cookware industry since 2007, so they know what they’re talking about!
We’ve assembled five easy baking recipes perfect for beginners. These crowdpleasers will help you learn basic baking techniques and boost your confidence.

Sometimes, the simplest things are the best. A classic chocolate chip cookie is one of life’s greatest pleasures. Don’t you want to learn how to make your own? We swear homemade cookies are so much better than store bought.
This beginner-friendly recipe doesn’t require any specialised equipment. All you need is your GreenPan ceramic nonstick sheet pan, to ensure your cookies don’t stick. With GreenPan, you have peace of mind both that your food won’t get stuck onto the pan, and that your cookware is free from forever chemicals, or PFAS, which are often found in conventional nonstick bakeware and live forever in your body and the environment. We’ll take our bakingware chemical-free, thanks!
Makes: around 24 cookies depending on size
1. Preheat your oven to 350°F (175°C). Lay out your GreenPan sheet pan ready.
2. In a large mixing bowl, cream together the softened butter, granulated sugar, and brown sugar using an electric mixer or a hand whisk. Beat the mixture on medium speed for about 2-3 minutes until it's light and fluffy. If you don’t mix enough, your cookies will be dense, so get an arm workout in!
3. Add the eggs one at a time, mixing well after each addition. Then add the vanilla extract. Scrape down the sides of the bowl to make sure everything is well combined.
4. In a separate bowl, whisk together the flour, baking soda, and salt.
5. Gradually add the dry ingredients to the wet ingredients, mixing just until everything is combined.
6. Stir in the chocolate chips until they’re evenly distributed.
7. Use a spoon to place spoonfuls of dough onto the prepared baking sheet. Space the balls about 2 inches apart to allow room for spreading.
8. Bake the cookies in the preheated oven for 9-11 minutes, or until the edges are golden brown and the centers are set. Keep a close eye on them, as they bake fast.
9. Allow the cookies to cool on the baking sheet for 2-3 minutes before transferring them to the cooling rack.
Add a twist: sprinkle a pinch of sea salt on top of each cookie ball before baking to create a mouthwateringly delicious subtle salty-sweet effect.

These simple, reliable blueberry muffins turn out well every time thanks to the impressive toxin-free nonstick surface of GreenPan’s Reserve bakeware muffin pan. Soft and fluffy, you’ll feel like you’re in a romcom serving these up to your family on a Sunday morning.
Makes: 12 muffins
1. Preheat your oven to 375°F (190°C). Line the muffin pan with liner if you wish. GreenPan’s ceramic nonstick is incredibly effective, but if you’re eating your muffins on-the-go, it can be helpful to use liners to contain them.
2. In a large bowl, whisk together the flour, sugar, baking powder, baking soda, and salt.
3. In a separate bowl, whisk together the melted butter, eggs, milk, and vanilla extract.
4. Make a well in the center of your dry ingredients and pour the wet mixture in. Stir gently with a spatula or spoon until just combined. Be careful not to overmix! Muffins benefit from gentle stirring, as overmixing can result in dense muffins.
5. Gently fold the blueberries into the batter.
6. Use a spoon or an ice cream scoop to divide the batter evenly among the muffin cups, filling each cup about 3/4 full. If you’re using the optional tablespoon of sugar, sprinkle it evenly over the tops of the muffins for a little extra sweetness and a crunchy top.
7. Bake for 18-22 minutes, or until a toothpick inserted into the center of a muffin comes out clean or with just a few crumbs attached. Keep an eye on the muffins starting from around every 15 minutes, as every oven cooks differently.
8. Let the muffins cool in their pan for around 5 minutes, then transfer them to GreenPan’s cooling rack to cool completely (if you can wait that long before digging in!)
Add a twist: add ground almonds to the batter for extra protein. Replace 1/2 cup (60g) of the flour with 1/2 cup (50g) of ground almonds (or another ground nut, such as hazelnuts) to boost the protein content. This makes the muffins slightly denser, but adds a toasted, nutty flavor.

A moist chocolate cake should be in the arsenal of any baking newbie. Although this cake tastes rich, it’s made of store cupboard ingredients you probably already have in your kitchen.
People get nervous that their cakes won’t turn out, but with GreenPan’s Reserve bakeware 9 inch round cake pans, you don’t need to worry. Durable and built to last, they’re designed to easily release baked goods perfectly every time.
Makes: 2 9-inch cake layers
For the cake:
For the chocolate frosting:
1. Preheat your oven to 350°F (175°C). Grease and flour your two 9-inch round cake pans, or line them with parchment paper circles for easy removal.
2. In a large bowl, whisk together the flour, sugar, cocoa powder, baking powder, baking soda, and salt.
3. Add the eggs, milk, oil, and vanilla extract to the bowl with the dry ingredients. Mix using an electric mixer or a whisk until well combined. The batter will look thick at this stage, but it’s supposed to look like this!
4. Slowly add the boiling water (or coffee if you prefer) to the batter. Don’t worry if the batter looks thin. This liquid helps create a moist texture, helping the cake rise beautifully.
5. Pour the batter evenly into the two prepared pans. Bake for 30-35 minutes, or until a toothpick inserted into the center comes out clean. Don’t open the oven too often during baking, as this can cause the cakes to fall flat instead of rising, but do keep an eye on them to ensure they’re not burning, as oven temperatures vary.
6. Let the cakes cool in the pans for 10 minutes, then turn them out onto your GreenPan cooling rack to cool completely. Unlike with other baked goods, which are usually even better if you dig into them while still warm, it’s important to wait until your cake is completely cooled before icing as otherwise your icing could melt.
Chocolate frosting instructions:
1. In a medium bowl, beat the softened butter until smooth. Add the cocoa powder and continue to mix. Gradually add the powdered sugar, alternating with the milk, until you reach a smooth, spreadable consistency.
2. Stir in the vanilla extract and a pinch of salt.
3. Once the cakes are completely cool, spread a generous layer of frosting on top of one cake layer. Place the second layer on top and continue to frost the top and sides of the cake. Feel free to top with candy, chocolate chips, powdered sugar, or anything else your heart desires.
Add a twist: try adding some fresh fruit as a decorative cake garnish for a juicy, sweet effect. Layer raspberries, strawberries, or your other favorite fruit between the layers and on top of the cake after frosting.

A loaf cake is an excellent choice for beginners as it’s an all-in-one dish, with no need to worry about anything too fiddly. Using GreenPan’s bakeware helps enormously, too, thanks to its quick and evenly distributed heating which ensures your lemon loaf cooks perfectly every time. A zesty lemon glaze adds an extra layer of flavor and an irresistible slight crunch to the top. When life gives you lemons, make this lemon loaf cake!
Makes: 1 loaf cake
For the cake:
For the lemon glaze:
1. Preheat your oven to 350°F (175°C). Grease and flour your loaf pan, or line it with parchment paper for easy removal after baking.
2. In a medium bowl, whisk together the flour, baking powder, baking soda, and salt. Set aside.
3. In a large bowl, beat the softened butter and sugar together with an electric mixer or whisk until light and fluffy, about 2-3 minutes. This step adds air to the batter, helping the cake rise.
4. Add the eggs one at a time, beating well after each addition. Stir in the lemon juice, lemon zest, and vanilla extract. Continue to mix until smooth.
5. Gradually add the dry ingredients to the wet ingredients, mixing just until combined.
6. Pour in the milk and gently fold it in. The batter should be smooth and slightly thick.
7. Pour the batter into your prepared GreenPan loaf pan and smooth the top with a spatula. Bake for 45-50 minutes, or until a toothpick inserted into the center comes out clean or with a few moist crumbs attached. Start checking the cake 10 minutes before your timer goes off to ensure it’s not cooking too quickly.
8. Let the cake cool in the pan for 10 minutes before transferring it to a wire rack to cool completely.
9. While the cake cools, make the glaze. In a small bowl, whisk together the powdered sugar and lemon juice until smooth. Drizzle the glaze over the cooled cake. Garnish with extra lemon zest if desired.
Add a twist: replace lemon with another citrus fruit, such as lime or grapefruit, for an even tangier twist!

Fruit pies scream summer, but for beginner bakers pastry can feel intimidating. We’ve found a simple workaround using pre-made pastry (as Ina Garten would say, store bought is fine!) that makes the buttery, flaky, golden pie of your dreams. Top with whatever fruit is in season (or on sale at the farmer’s market) and serve up a slice with a fat scoop of ice cream for an unbeatable summer dessert.
Investing in GreenPan’s gorgeous Reserve bakeware pays off when you don’t have to bother transferring your pie to a plate to serve: GreenPan’s nonstick ceramic is beautiful enough by itself! Available in cream, twilight, and sage, it’s sure to turn heads.
Makes: 1 half sheet pan-sized pie. To make half the recipe on GreenPan’s quarter sheet pan, simply halve the ingredients.
Crust:
Filling:
Optional:
1. Roll out both packages of pie dough, overlapping them slightly in the middle and pressing down gently to seal the seams, and place it onto your sheet pan. Make sure the dough fits the entire pan, including the sides. Trim the excess and fold over the edges to create a border so any juice doesn’t spill out.
2. In a large bowl, combine the strawberries, blueberries, and peaches. Add the sugar, cornstarch, lemon zest and lemon juice. Stir gently to combine, ensuring the fruit is evenly coated. The cornstarch will help to thicken the juices as the pie bakes.
3. Pour the fruit filling evenly over the pastry. Spread it out with to ensure it's evenly distributed.
4. Optional: using a pastry brush or a spoon, lightly brush the edges of the crust with heavy cream. This will help the crust turn golden and shiny as it bakes. If you’d like a little extra crunch and sweetness on the crust, sprinkle coarse sugar over the top before baking.
5. Bake in a preheated 375°F (190°C) oven for 40-45 minutes. Check at the 35-minute mark and cover the pie’s edges with foil if they are getting too dark.
6. Once the pastry is golden brown and the fruit is bubbling, remove the pie from the oven and allow it to cool for about 15-20 minutes. This will give the juices time to set and make it easier to slice.
Add a twist: try adding a crumble topping to your pie for added texture. Mix together 1/2 cup flour, 1/2 cup oats, 1/4 cup butter, and 1/4 cup sugar and sprinkle this over the fruit before baking.

.webp)


.webp)


